
The image used for deploying session hosts that make up a host pool can be updated through the VCL site. The process is basically the same as creating a traditional VCL image.
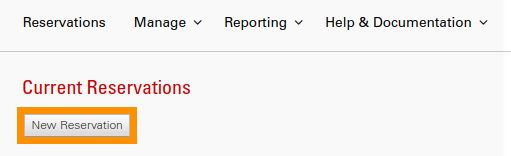
- Go to the VCL Reservations page
- Click on the New Reservation button
- Select either a general base AVD image or the AVD image for the host pool you would like to update (Hint: enter base image in the search box to help find AVD base images). The typical naming convention for host pool images is AVD <host pool name> Base image.
- Select the Azure Image Creation radio button
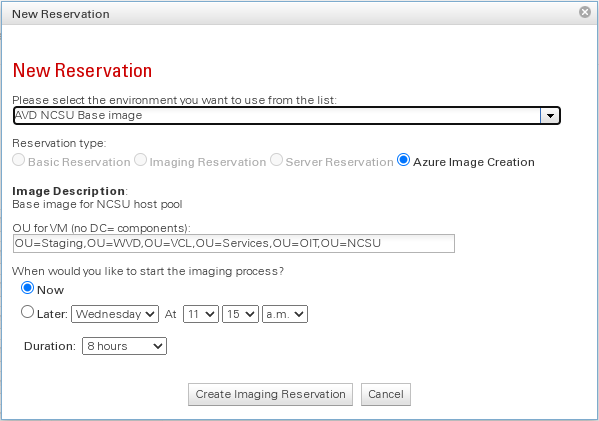
- Fill in the OU for where the computer that will be deployed should be joined in WolfTech. If the image has previously been deployed, it should automatically populate with where it was last joined.
- Select a duration for your reservation.
Tip: It is a good idea to select a really long duration such as several days to ensure you have plenty of time to get everything installed in the image. - Click Create Imaging Reservation
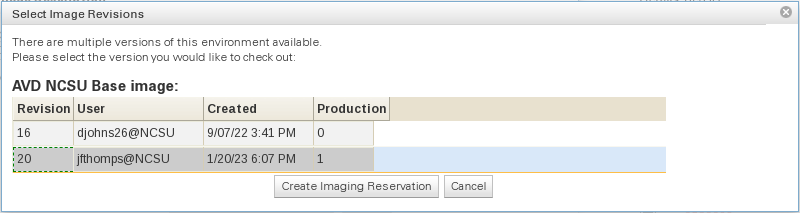
- If there are multiple revisions of the image, you will be prompted to select which revision you would like to use. You’ll likely want to use the most recent revision.
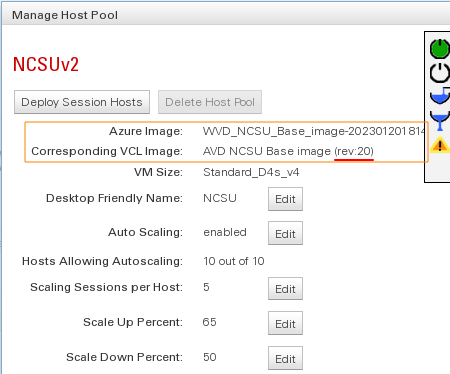
It is also helpful to see what revision was used to deploy the current session hosts. You can view this under Manage->Manage AVD->Manage AVD Host Pools, and clicking Manage for the desired host pool. If all hosts in the pool have been deployed with the same image, that image will be displayed at the top of the dialog box. In the box, Azure Image refers to the name of the Azure image. Corresponding VCL Image is the corresponding name of the image in VCL. The revision of the VCL image will be listed in parenthesis after the VCL image name.
- Click Create Imaging Reservation
- Now, the selected image should be deploying.
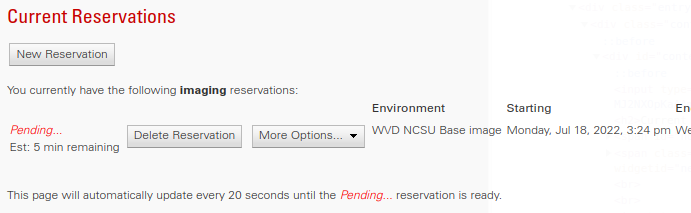
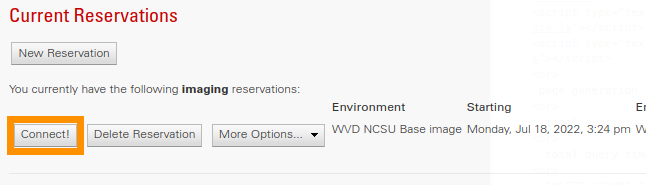
- Once it finishes and the Connect button is displayed, click Connect to view information on how to connect to the reservation
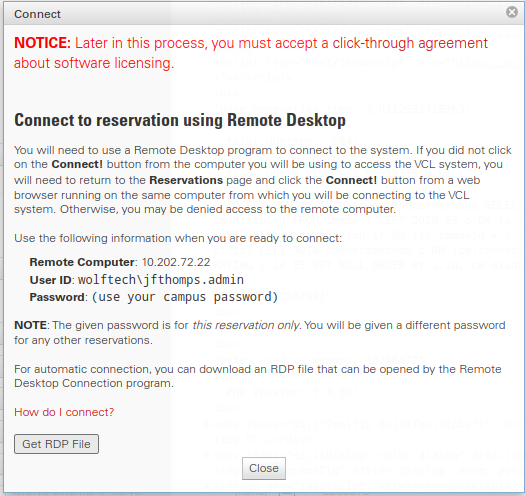
- Use an RDP client to log in to the VM. If you are off campus, you will need to use the VPN to connect.
- Once you are connected, modify the VM as needed. Since the VM is joined to WolfTech, any Group Policies associated with the OU it is in or groups it is part of will eventually be applied. Also, Software Center can be used to install software as long as the VM is in the right groups to see the software. It can take a long time before the software packages show up in Software Center.
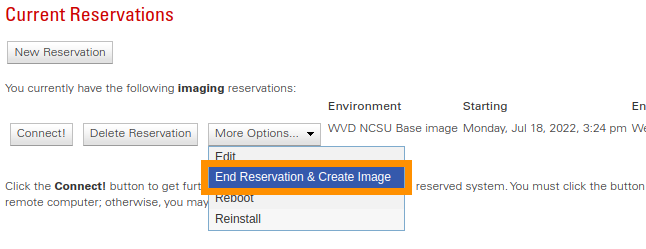
- Once finished configuring things on the VM, return to the VCL Reservations page.
- Select More Options->End Reservation & Create Image
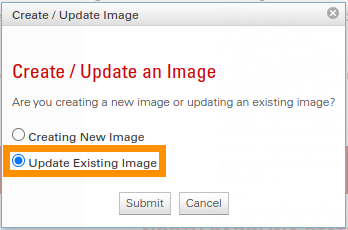
- In the following dialog box that is displayed, select Update Existing Image (unless you used a base image or need to fork the image to create a separate VCL image)
- After clicking Submit, you will see a dialog box for entering comments about what was done in this revision of the image. These notes are only visible to others with administrative access to the image.

- Click Submit after entering comments. You will be prompted with an Installer Agreement. Please read over it to ensure you agree with it. Any software installed that included a Clickwrap agreement must be approved by the Software Committee
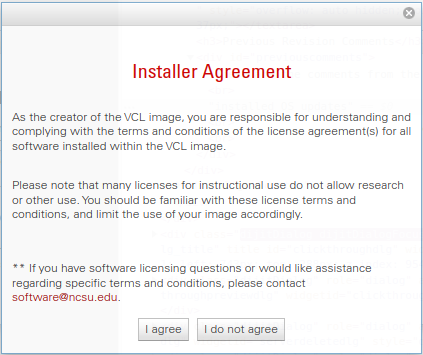
- Clicking I agree will start the imaging process. (I do not agree will close all imaging dialogs and take you back to the Reservations page without doing anything to the reservation.)
- Once the image capture process completes, you will be able to use the new image to deploy new session hosts in a host pool.